


Hello everyone, and welcome back to our corner dedicated to the “science of pastry”! Today we’re diving into one of the most important techniques for perfect leavened dough: the windowpane test.
As a biologist, my mind is programmed to always ask “why?”. As a Pastry Chef, my heart demands a flawless result. This simple test is where those two worlds merge, allowing us to look inside our dough and understand if it’s ready to become a masterpiece.
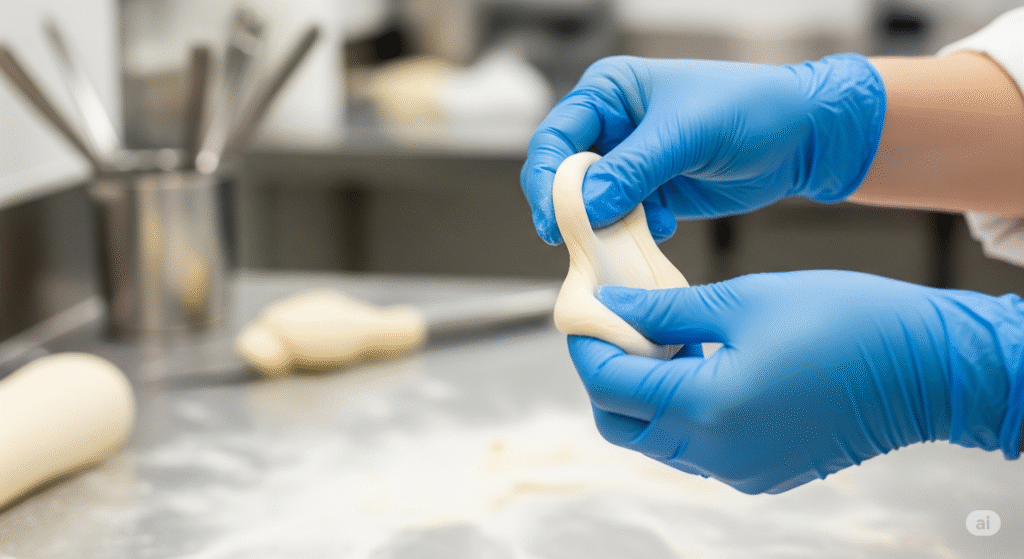
What is the Windowpane Test and How Do You Perform It?
Here’s the step-by-step process:
- The Sample: Lightly wet your fingers and pinch off a small piece of dough, about the size of a walnut.
- The Warm-up: Work it between your hands for a few moments to make it more pliable.
- The Stretch: Very gently, begin to stretch the dough from the center outwards, using the fingers of both hands. The movement should be slow and progressive, as if you were opening a precious scroll.
Your goal is to create a “membrane,” a veil of dough so thin it becomes almost transparent, allowing light to pass through without tearing.
The stretching phase begins, where the gluten network starts to align and build strength.
The Biology of Kneading: What’s Really Happening Inside?
This is where science (specifically, Rheology) comes into play. When we mix flour and water, two insoluble proteins—gliadin and glutenin—begin to bond together thanks to mechanical action. This process creates a three-dimensional, elastic, and tenacious structure: the gluten network.
Think of this network as the steel frame of a building. It’s what will trap the gases produced by the yeast during fermentation, allowing our bread or brioche to rise, develop a beautiful open crumb, and have a soft texture.
The windowpane test does nothing more than check the health and development of this protein network.
- If the dough tears immediately: The gluten network is still weak and underdeveloped. The proteins haven’t formed strong enough bonds, and the dough won’t have the strength to support fermentation. You need to keep kneading.
- If the dough stretches until it’s translucent: Bingo! You have developed a strong, elastic, and impermeable gluten network. It is now ready to do its job: trap carbon dioxide and let your product explode with volume during baking.
Why Is This So Important? The Difference Between Success and Failure
Correctly performing the windowpane test isn’t just for professionals; it’s the single action that determines the difference between:
- A well-risen loaf with a light, open crumb, and a flat, dense, “sad” loaf.
- A fluffy, airy brioche and a gummy, heavy product.
- A panettone that rises majestically in its mold and one that miserably collapses on itself.
My mantra has always been: understand to do better. The windowpane test is the embodiment of this philosophy. It’s a simple gesture that holds a deep understanding of the material you’re working with. It allows you to stop guessing and gives you full control over the process.
Don’t be afraid to “feel” the dough, to have a dialogue with it. Observe how it behaves, how it reacts to tension. That is where the true art of baking lies: in the perfect fusion of technique, science, and sensitivity.
Until next time, and may the science be with you!
With Passion and Precision,
Katia Oldani, Biologist Pastry Chef